Grid-based Inventory System
What?
For this project, my goal was to create a Grid-Based Inventory System and the tools to support it. This was created both for my specialization project and to be used in the project: Sub Umbra
Initially, I planned to focus more on the gameplay aspects, but I ultimately decided to concentrate on developing tools and making it accessible for other programmers to work with.
Why?
Inventory management is something that I've always enjoyed in games. The original Resident Evil 4 remains one of my all-time favourites, and it was the inventory system that initially drew me in.
The unique system, where you had to strategically move and rotate items to optimize limited space or combine objects to free up room, was what made it so engaging.
While I took inspiration from RE4 for this project, I also took inspiration from games such as Tarkov and Delta Force: Hawk Ops. These games feature a grid-based inventory system, but with the added complexity of subdivisions in the inventory, making the management more challenging and rewarding.
Key Features
-
Grid-Based Inventory System
-
Modular, multi-slot inventory system with items that vary in shape and size
-
-
Multiple Containers
-
Items can be transferred between storages like backpacks or rigs, each with their own grid layout. Each storage can have multiple containers to sub-divide the inventory.
-
-
Item Rotation
-
Rotate items to fit them into available space and give more to the puzzle feeling
-
-
Right-Click Actions
-
Context menu for item interactions like Use and Drop
-
-
Crafting System
-
Drag-and-drop crafting inspired by Resident Evil 4
-
-
Tools
-
Item Editor
-
Editor for creating and modifying items, with drag and drop functionality for assets.
-
-
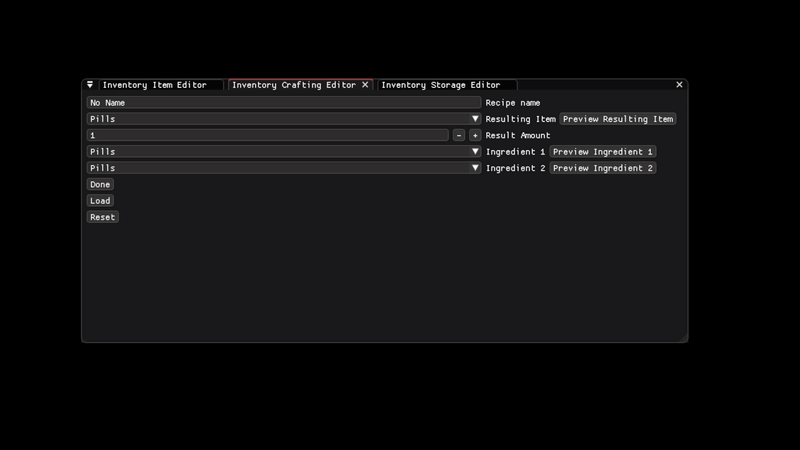
Crafting Recipe Editor
-
Editor for creating and modifying crafting recipes. All items are preloaded and displayed in a searchable combo box for easier use.
-
-
Container Layout Editor (Not finished)
-
Would have allowed for creation of layouts for new storages with support for multiple containers. Would also have include a preview system.
-
-
Inventory Item Editor

Inventory Crafting Editor
Inventory Storage Editor (W.I.P)

How?
Preparations
I began the project by creating the base classes for the Inventory System and UI. For the UI I had to implemented a layering system, to manage how sprites were displayed. This was needed to ensure that containers didn't block the view of items.
I also developed a button class, which would later be used to handle interactions with items in the inventory.
Additionally, I prepared the necessary data structures to hold the data for the items, recipes, and set up the foundational classes for the entire system.
Grid
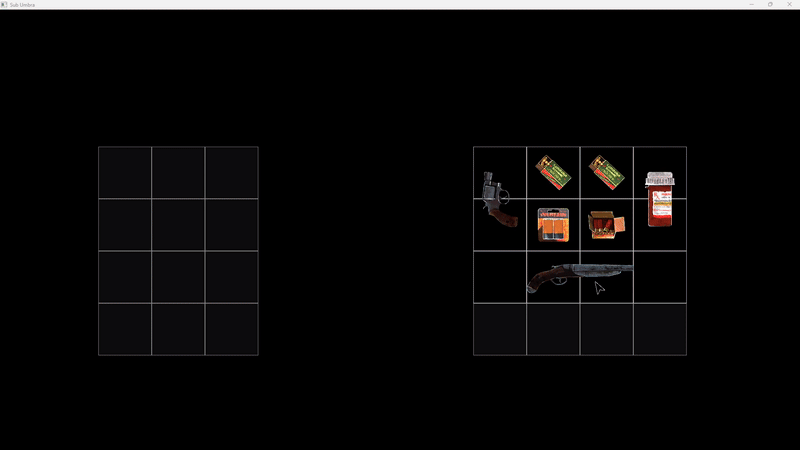
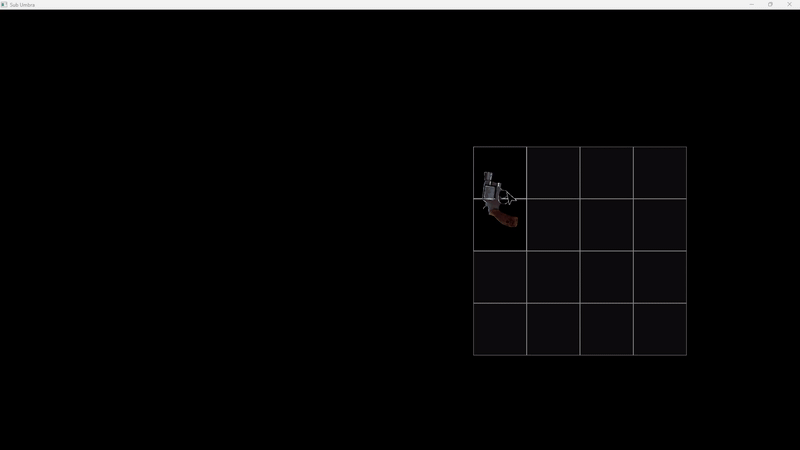
The first step was to set up the grid. I made the InventoryManager responsible for holding the grid and gave it a vector of containers. Each container contained a 2D array of grid cells, and each cell tracked its state (whether it was filled or empty) as well as the sprite for the cell.
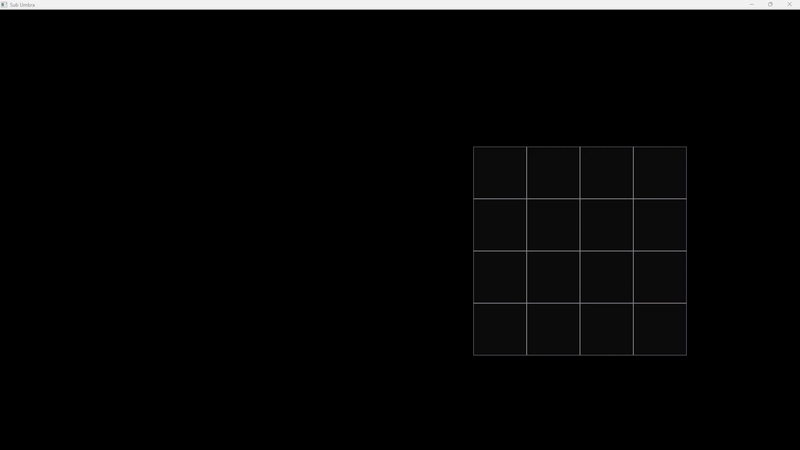
I started by creating a container with the size of 4x4, and displayed it on the screen.

Base grid
Items
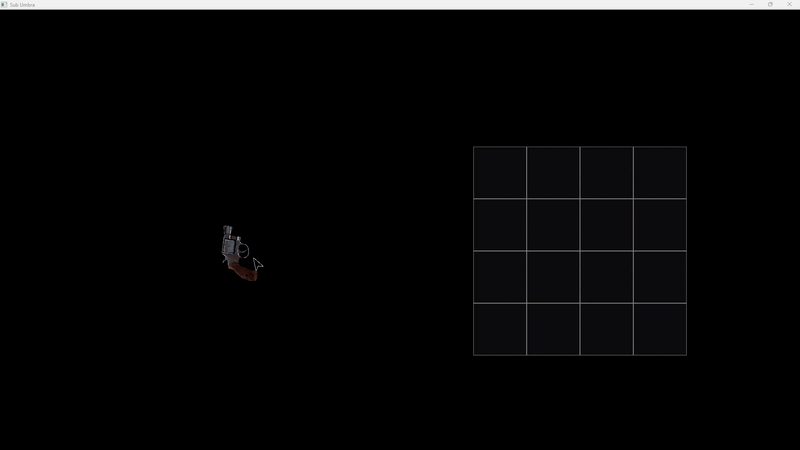
Spawning a Icon and dragging it around with the mouse
Once the grid was set up, the next step was to create the items. I began the previously created ItemDesc structure, populating it with data, and then created an Item object and rendered it on the screen.
Next, I added a collision box to the item, and implemented checks for mouse interaction. If the mouse hovered over the collision box and the left mouse button was pressed, the item would enter a "dragged" state. While in this state the item would follow the mouse until the left-click was released.
With this setup, I now had the ability to interact with and move items around within the inventory.
Items Insertion
Now that I could drag items around, the next logical step was to allow dropping them into the grid by.
I created a TryAddItem function in both the InventoryManager and the Container class. The InventoryManager iterates through all containers (at this point only support for one), and attempts to insert the item.
In the container, the function checks how many available slots are left. If the available space is smaller than the item's total size, the insertion is rejected. Otherwise, the function iterates through the grid array, searching for an empty spot and then tries to fit the item's shape. If it doesn't fit, move to the next available slot and keep trying.
The item is stored as a shared_ptr in the InventoryManager and a weak_ptr in the container.
Clicking a debug key to add Revolver items into the grid
Dragging an item and moving it around the container.
Dropped into the world when released out of bounds.
Drag & Drop Insertion
The next step was adding item drag-and-drop functionality into the inventory. In the InventoryManager, I tracked the mouse state and the UID of the last dragged item.
When the left mouse button is released, and the UID is valid, check if the mouse is hovering over a container. If the item doesn't fit, go back to the original location, otherwise move the item to the new spot.
If the left mouse isn't hovering any container, then drop the item into the world.
Stackable Items
Once I had the basic interaction with the grid and items in place, I moved on to implementing stackable items.
When the player picks up an item and there's enough space in the container, check if the item is stackable. If it is, iterate through the vector in the container with existing items and compare their type IDs. If the IDs match, add to the stack.
If the stack is already full, but there's still remaining quantity in the item that is being picked up, continue checking and inserting. If none are left, simply find an empty slot and insert the new item there
Also implemented so items can drag and drop on each other to transfer item quantity. If the quantity reaches zero, remove the item.

Adding 5 ammo on key press, max ammo per item is 4
Rotate Items
After this I wanted to work on item rotation. When dragging an item, the player can press the R key to rotate the sprite and flip the item size to match the rotation. This simple addition made the inventory feel much better.
When picking up an item, the system would also try to rotate the item and check if it fits sideways. This would only happen if the item shape isn't a square. First check normally, if it doesn't fit, rotate the item by 90 degrees and check again.
Holding an item and pressing R key to rotate. Items rotating before being added to the grid
Buttons
The next step was implementing right-click functionality for items. My plan was to have a few context menu actions, specifically Use and Drop. I had considered a Combine option, but that idea was eventually scrapped.
I started by implementing the Drop Action. When an item is right-clicked, a button appears at the cursor position. Clicking the button calls the drop function and removes the item from the inventory.
I'll go into detail about the Use functionality later.
Displaying a button on right click. On click drops the item
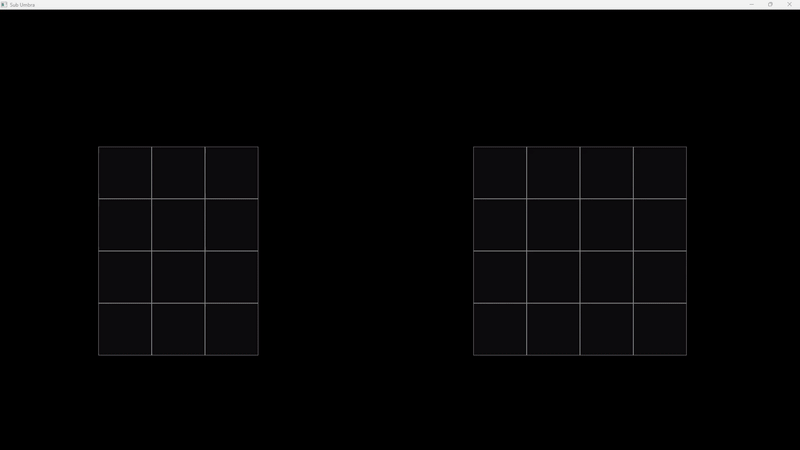
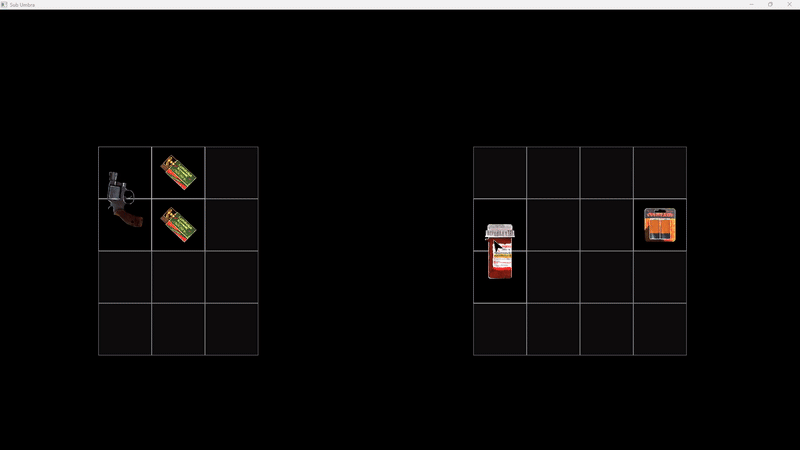
Multiple Containers
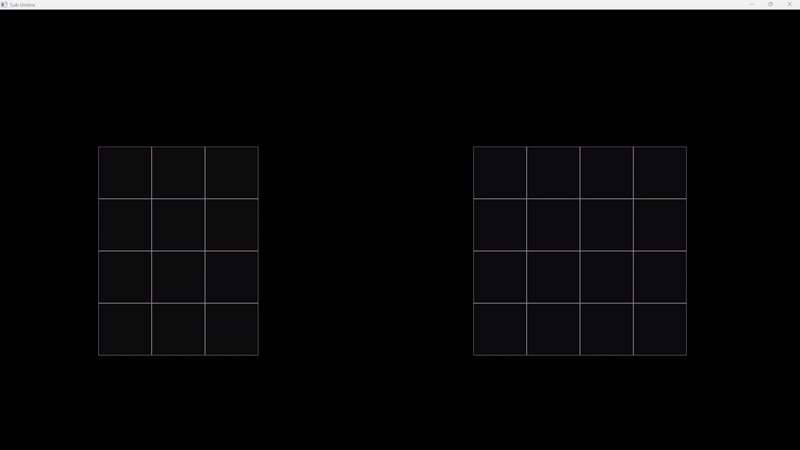
Showing item transfering between containers
The next step was adding support for multiple containers withing an inventory. A container is essentially a grid of slots, and an inventory can hold several of these containers.
When dragging an item into a container, it first checks the item's original container and then checks the mouse position to identify the new container. If the item is being moved within the same container, the process works as usual.
If the item is being dragged into a new container, it is removed from the old container and transfer it over to the new one.
This change enabled the posibility to have more complex inventories.
Crafting
After that, I moved on to the crafting system. Originally, I had planned for a more extensive setup with menus and categories, but I decided to keep things simple instead.
I took inspiration from the original Resident Evil 4, where players could combine herbs by dragging one on top of another and they created a mixed herb. My system combines two items and creates a new item.
In my case I combined items on top of each other, and it resulted in a completely new item. I had a struct with crafting recipes. It held a resulting type ID, a quantity, and two IngredientIDs.
If two items collided, I checked all of the recipes and compared IDs. If they matched any existing recipe, then remove 1 from their quantity, and create an item based on the resulting ID.
Recipe, consumes 1 out of 2 batteries, and 1 pill, to produce 1 shotgun ammo
Item Uses


Right clicking shows two buttons, one for use and one for drop. When use is pressed, item is consumed
The next big step, and one that took a lot of planning was building the item use. I hadn't give it much though, I expected it to be quite simple, however, once I started designing it properly, I realized it needed to be far more flexible and scalable.
I wanted a system that allowed items to call functions, each with custom arguments, while also being modular and easily expandable. After some research I found std::variants. std::variants allows you to store any type from a set of predefined types, and it's much more efficient and safer than using alternatives like std::any. For the actual function handling, I created an alias for the function, making it faster to encode.
I built the system around this, using an unordered_map that stored entries with a string as the key. In each entry I stored the function name, the function lambda, a vector of std::variants, and a couple string vectors to store variable names and variable descriptions. The purpose of the names and descriptions was to be integrated in a tool later on, helping designers to easily understand what each function did and what arguments they were modifying.
To access these function entries I stored the function name as a std::string in my ItemDesc Struct. This allowed the system to look up the corresponding function when the item was used.
I now could implement the use button, and have an item call a function and then be consumed.
First Tool: Item Creation Tool
After completing the base system, I focused on tool development to simplify item creation, crafting recipes and container layouts.
The first tool was the Item Creation Tool. I designed a UI using ImGui where each field of the ItemDesc struct had its own input widget. Special cases like item uses, asset paths, and sizes required extra handling.
For asset paths, I utilized the engine's content browser with drag-and-drop support, where dragging an asset would automatically set the path if valid, along with rendering the texture for verification.
For item uses, I created a combo box listing functions like "Player Heal" or "Reload Battery", ecah with a vector of arguments stored as std::variant. I used std::visit to identify argument types, then applied the corresponding ImGui input function (e.g., ImGui::InputFloat, ImGui::InputInt).
Item sizes were calculated by dividing texture dimensions by 128px, matching the grid size. For example a 256x128 texture would occupy a 2x1 grid space.
Finally I saved the item data in a .json file. While straightforward for most variables, std::variant types required storing type names as strings. Upon reading the file, I compared the name to the type ID and casted accordingly.

Displaying how the tool works
Second Tool: Crafting Tool
Displaying how the tool works
The second tool I developed was the Crafting Tool which stored two items to combine, the resulting item, and it's quantity, this part was straightforward.
Initially, users had to manually copy item IDs from files to create a recipe. To simplify this, I preloaded all items, storing their IDs and names, and added a combo box with a serach to display them. While the UI displayed item names, the IDs were stored in the crafting data .json.
I couldn't decide between using an ImGui-based search bar or a file explorer, as both had their pros and cons. Ultimately, I kept both versions in the Item Creation Tool and Crafting Tool for testing to determine which felt best.
I also added a preview button to verify items. When clicked, it imported the item data and inserted it into the Item Creation Tool for verification.
Third Tool: Layout Editor
Unfortunately, I didn't have enough time to complete the tool. However, I managed to implement the base functionality for assigning and setting the data for the containers.
The tools was designed to add containers, assign them a name and set their screen position. It was also planned to select a position with the mouse instead of just writing the pixel coordinates. Afterwards the user could select a different container and offset the container's position from it.
After setting all the data I would have a preview button to display the container layout and then a save and load button. The .json file would later be used to import the loadouts in-game and have the capability to swap the inventory with a new layout. The swapping mechanic was implemented, I didn't have time to complete the loading of saved loadouts.

Displaying how far the tool is in development
Retrospective
I’m pretty proud of the work I’ve done. Feels like I’ve completed a big goal of mine, and overall, I think I did a pretty solid job. I might've aimed a bit higher than I should’ve, not fully accounting for all the hurdles, but honestly, I’m glad I did. It gave me the chance to work on a lot of important stuff that makes an inventory system really come together.
I’m also happy with the tools I built. Even though I didn’t have time to finish the Inventory Storage Editor, I like the progress I made. I feel like with a few more days, I could wrap it up and polish it.
If I had more time, I’d definitely finish the Inventory Storage Editor. Then I’d look into adding more storage features, like having multiple storage systems for a character and creating specific slots for gear like weapons, helmets, backpacks, etc. I would've also liked to display the item stats, such as name, description and stack size, but the issue was that the text rendering support was being worked on by a fellow programmer but it wasn't finished in time.
Credits
Special thanks to Remy Aili Vestén for creating the UI for the inventory system!